
Part of being an experienced developer implies having a certain level of familiarity with techniques that help you develop your projects more effectively. In this new “UiPath Tips and Tricks” series I will be sharing techniques with you that will have you developing projects like an expert!
Let’s start with a UiPath Activity that you’re probably already familiar with – adding an auto number column to an existing data table that’s already populated with data.
Using the UiPath Activity to add an auto number column can be a helpful shortcut. The downside, however, is that you will not have the auto numbered values after. In fact, you add just a column with no data. The auto number columns are useful because they help you uniquely identify a row within a collection of rows.
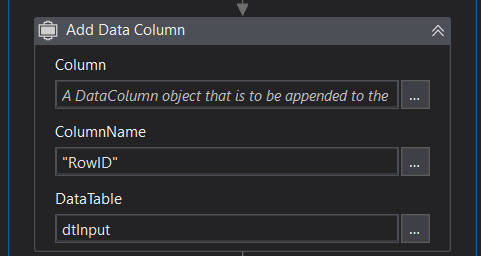
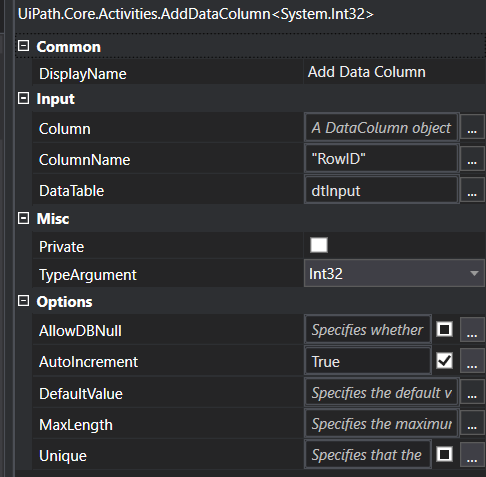
The challenge, thus, is figuring out how to add the column and to have the auto incremented numbers (values) in this column for the previously existing rows.
To accomplish that, I will use the invoke code activity, and I will explain the logic behind the code.
You can get the code in C# or VB.Net. I wrote the code in both languages.
You can also clone a demo project from GitHub:
https://github.com/BogdanIstrate/AutoNumberDemo.
The main idea is to transfer the data from the existing data table into a DataTableReader.
The DataTableReader obtains the contents of one or more DataTable objects in the form of one or more read-only, forward-only result sets. You can read more about the DataTableReader class here: https://learn.microsoft.com/en-us/dotnet/api/system.data.datatablereader.
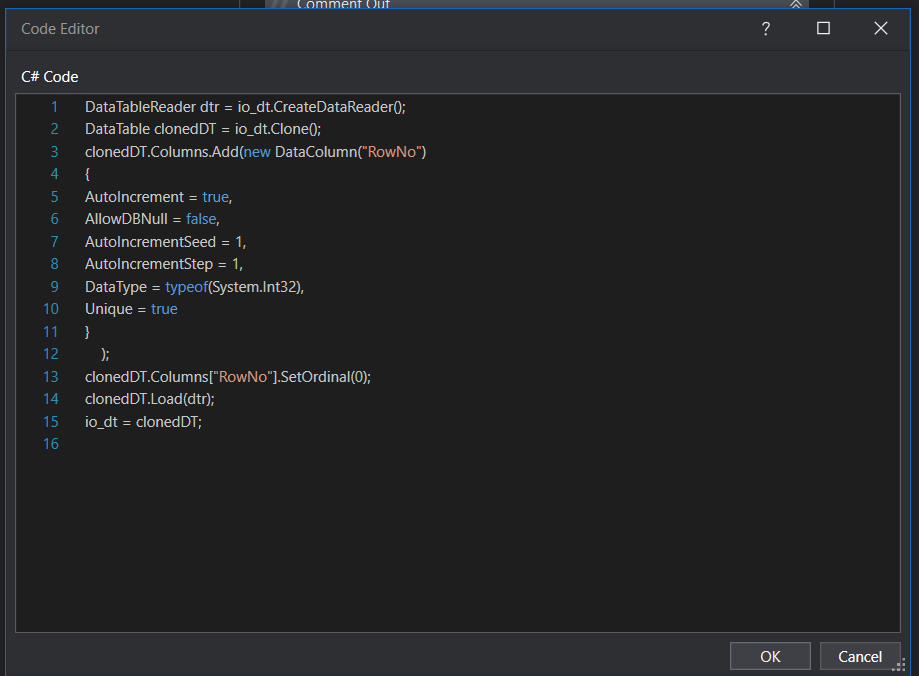
C# Code
DataTableReader dtr = io_dt.CreateDataReader();
DataTable clonedDT = io_dt.Clone();
clonedDT.Columns.Add(new DataColumn(“RowNo”)
{
AutoIncrement = true,
AllowDBNull = false,
AutoIncrementSeed = 1,
AutoIncrementStep = 1,
DataType = typeof(System.Int32),
Unique = true
}
);
clonedDT.Columns[“RowNo”].SetOrdinal(0);
clonedDT.Load(dtr);
io_dt = clonedDT;
VB.Net Code
Dim dtr As DataTableReader = io_dt.CreateDataReader()
Dim clonedDT As DataTable = io_dt.Clone()
Dim idCol As New DataColumn(“RowNo”)
idCol.AutoIncrement = True
idCol.AllowDBNull = False
idCol.AutoIncrementSeed = 1
idCol.AutoIncrementStep = 1
idCol.DataType = GetType(Integer)
idCol.Unique = True
clonedDT.Columns.Add(idCol)
clonedDT.Columns(“RowNo”).SetOrdinal(0)
clonedDT.Load(dtr)
io_dt = clonedDT

Let me explain the code now:
Step 1: Save the data from the existing data table (io_dt) into a DataTableReader (dtr).
Step2: Clone the existing date table into a new data table. As you know, the clone mechanism only copies the structure of an existing table to another table without data. Let’s name the new data table ‘clonedDT’.
Step 3: Assuming that new auto number column is named RowID, let’s add it to the clonedDT. When we add this column, we can specify several properties (AutoIncrement, AllowDBNull, AutoIncrementSeed, AutoIncrementStep, DataType, Unique). Here we have two interesting properties: AutoIncrementSeed, and AutoIncrementStep. The AutoIncrementSeed property is used to set the starting value (default value is 0). AutoIncrementStep sets the increment used by the RowID column. You can find more documentation about these column properties here:
https://learn.microsoft.com/en-us/dotnet/api/system.data.datacolumn?view=net-7.0.
One of my favorite methods is to set the ordinal of the auto numbered column in the data table. I do this because it is always recommended to have the auto number column first in the data table for better visibility, easier identification, and referral to that row. Therefore I always use SetOrdinal(0) method to set the auto number columns in the first position.
Step 4: Add the data to clonedDT from data table reader (dtr). In this manner, the new auto number column (RowID) and all other columns will have values.
You will be able to find the above mentioned code in the UiPath package (library) in a few weeks.
I hope you will find this useful in your projects.
Check back in with me each month for more UiPath Tips and Tricks that will have YOU developing like an expert!